Loading...
Loading...
Loading...
Loading...
Loading...
Loading...
Loading...
Loading...
A guide to help you understand the basic layout and navigation of the local TerminusDB dashboard
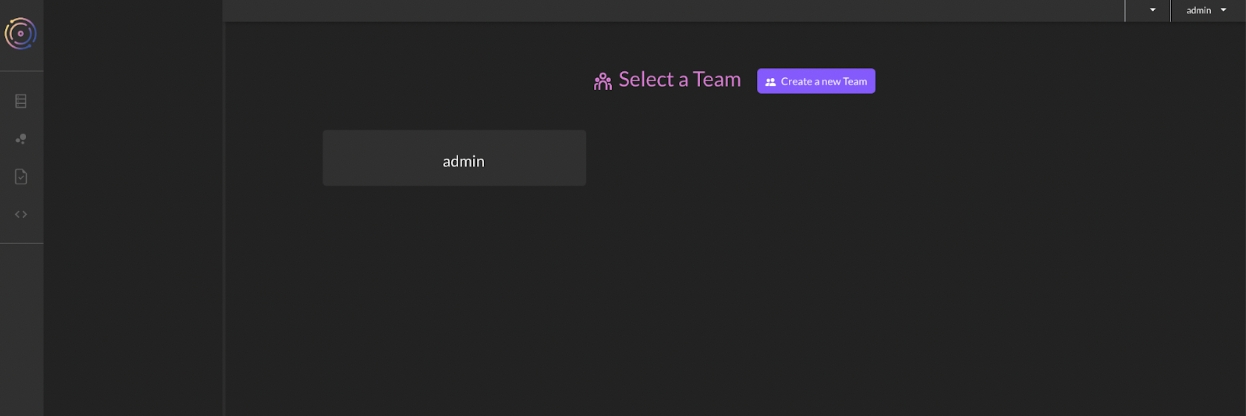
When first logged in, you will see a list of the teams you are part of. Click on a team.
The team selection layout looks as such:
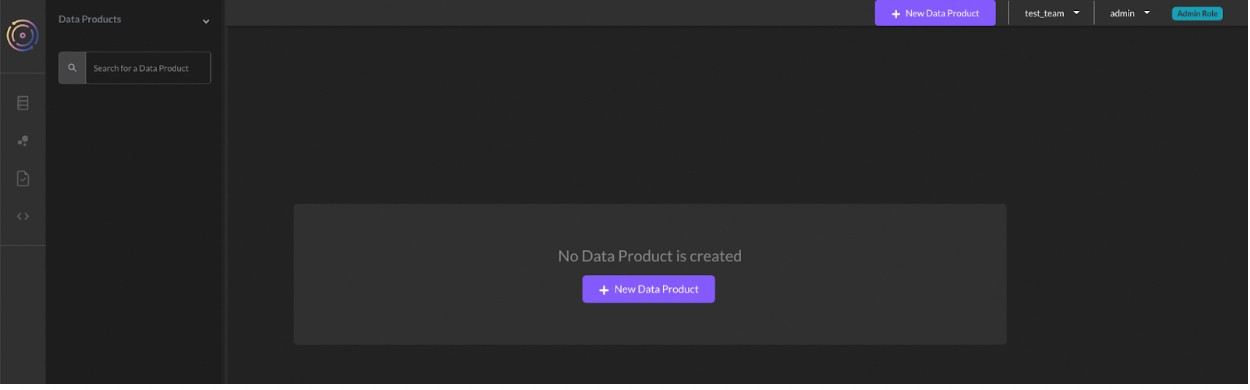
When you select a team, the layout looks like this:
Top Menu - From left to right:
Create a new data product
Team - use the dropdown menu to toggle between teams
User management & profile - Manage access control to teams and data products. In TerminusDB, and log in as different users.
Role - see your role for the team or data product.
Data Products - A team can have one or many data products. Data products within a team are shown in this pane.
Data Product Tools - Tools are only available when a data product is selected. From top to bottom:
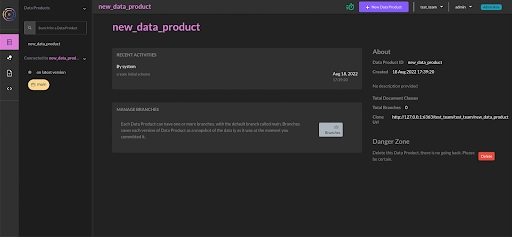
Data Product Home - Contains a snapshot of the data product, its recent commits, branch management, and the ability to delete the data product.
Model Builder - Build schema using our visual modeling tools, or simply import schema as JSON. You can create documents, subdocuments, and enums, and establish document properties and relationships to build your document graph.
Document Explorer - Once you’ve created your schema, you can explore the document frames and even add data to your database using the automatically generated forms.
WOQL Query Playground - Build and test queries against your data.
GraphQL Query Playground - As above but with GraphQL
How-to use the TerminusDB local dashboard
The TerminusDB local dashboard is included when you install TerminusDB as a Docker container. To use the dashboard visit:
Visit here for guidance on managing access control with the local TerminusDB dashboard.
A team and admin user are automatically created with both dashboards.
TerminusDB - admin user and admin team. The default values are:
Team: admin
User: admin
Password: root.
How to create a database using the TerminusDB local dashboard
Modeling data and content within TerminusDB and TerminusCMS using the UI and JSON
The TerminusCMS and TerminusDB dashboard comes with a visual schema builder. Here's a quick overview of how it works.
Choose Data Product Model from the lefthand menu - the second icon.
In the window, you will see an oval called your data product name schema. Click on the oval and select the + symbol.
Add a document or enum.
JSON documents form the nodes of the graph
Enumerated types are a set of possible choices
Select add document.
On the right, you will see a set of options to define the document:
Give it a unique ID (no spaces)
Define the document key, choose from (this blog will help you decide what key to use):
Lexical (need to set up document properties first)
Hash (need to set up document properties first)
Random
ValueHash
Add the document properties, choose from:
Enum - Need to create the enums before this option becomes available
Numeric
String
Geo
Temporal
Boolean
JSON
Link - building the relationships in the graph
On the next tab, you can see the relationships in the graph, this will show links between objects. You can also set the document as a parent/child of another document.
The final tab when creating the document shows it in its JSON format.
Save your document by clicking on the disk icon.
Creating subdocuments and enums can be achieved in much the same way.
Using a visual editor to model your data isn’t everyone’s cup of tea. Should you build your schema elsewhere, importing it into the dashboard is straightforward:
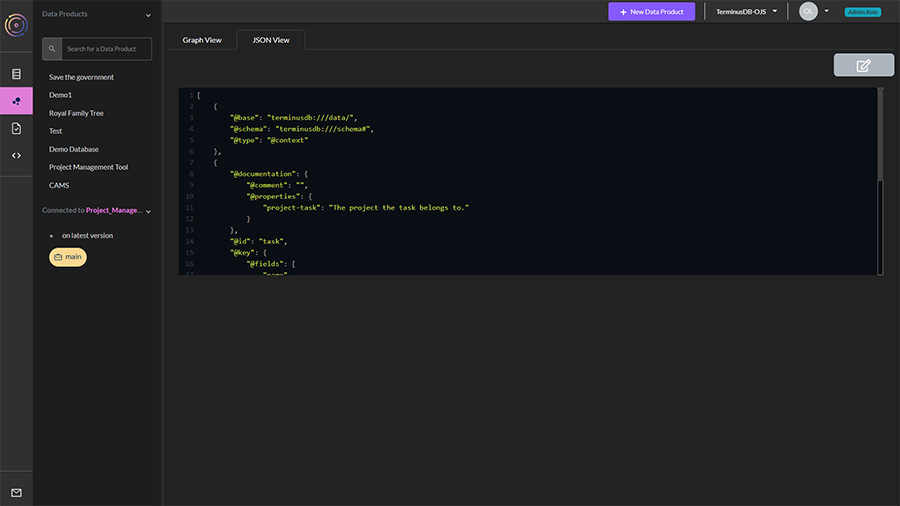
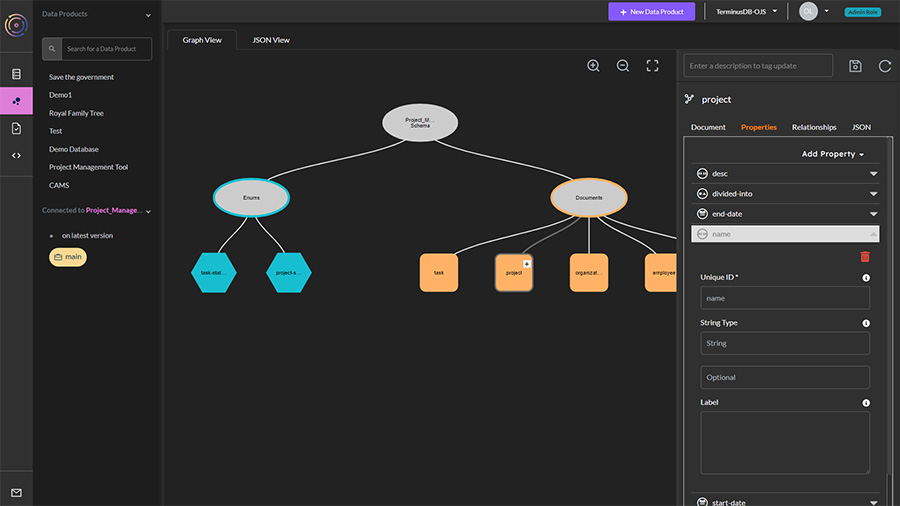
Choose Data Product Model from the lefthand menu - the second icon.
In the window, you will see two tabs, ‘Graph View’ and ‘JSON View’.
Select JSON View.
Click on the edit icon.
Paste your JSON schema into the window and save.
Your schema should now display in the graph view.
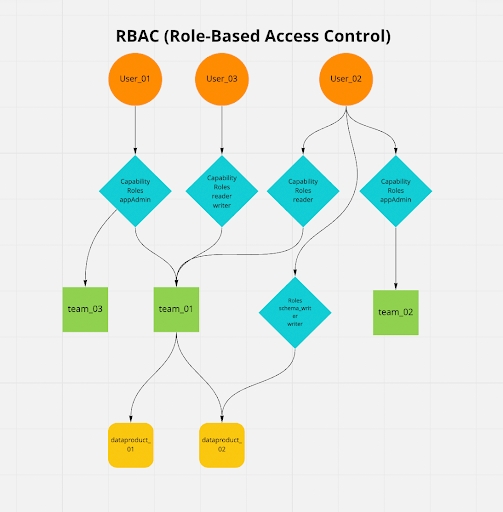
Use the Data Product Model view in TerminusCMS or the local TerminusDB dashboard (including in bootstrap install) to visually build simple or complex data models. The diagrams further below illustrate two possible implementations of the organization model introduced in the previous section. In addition to visually building models, the dashboard enables:
Flexible relationships between elements such as documents and sub-documents, and classes and sub-classes.
Enumeration objects related to document elements.
A comprehensive set of properties (XSD data types) for elements.
JSON views of product models and properties.
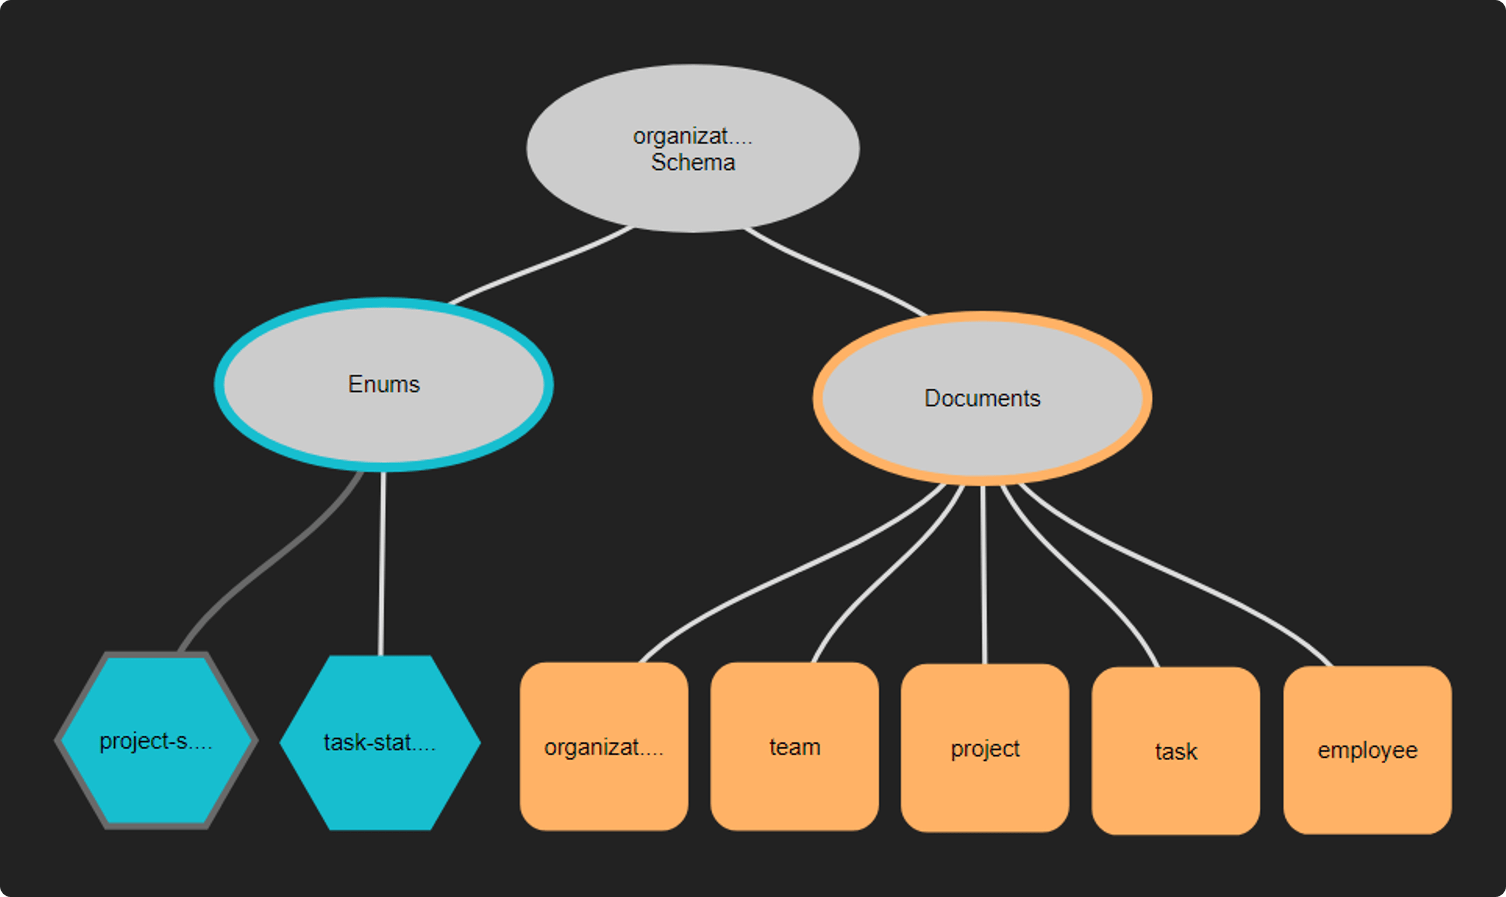
This example uses a simple project management application that has a data structure like:
The diagram below illustrates an implementation of the organization model using a simple document structure. The enumeration objects hold status values applicable to projects and tasks.
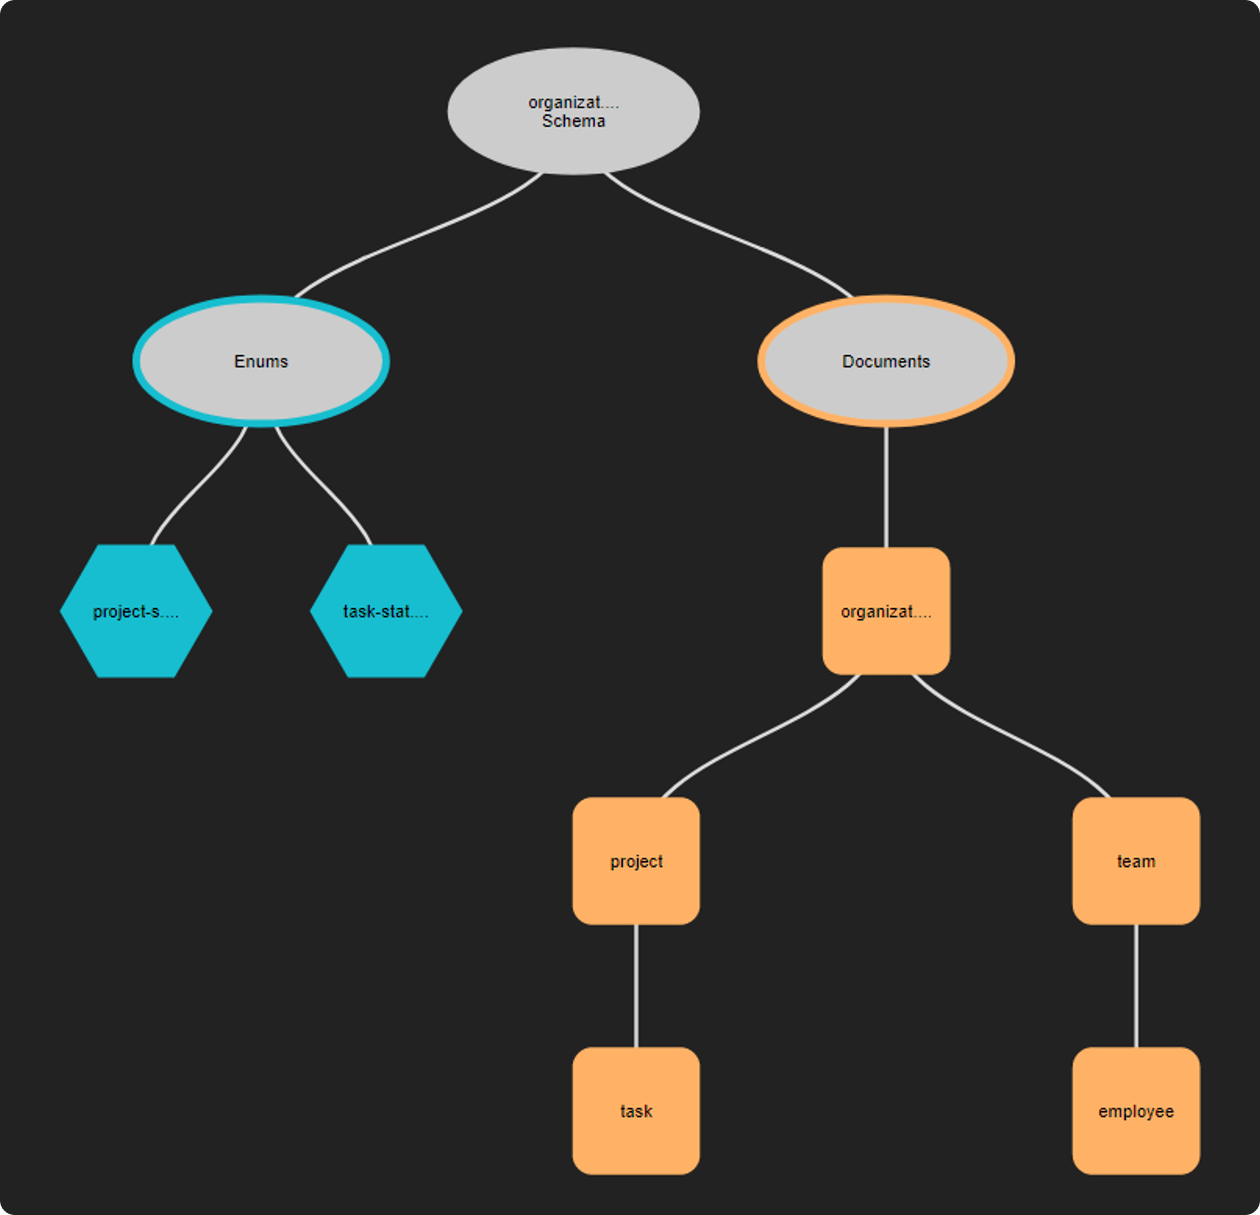
The diagram below illustrates a more intuitive implementation of the organization model using documents and sub-documents, or classes or sub-classes. This approach enables sub-documents to inherit the properties of the parent document - similar to inheritance in Object-Oriented Programming.
TerminusDB supports the creation of data models using JavaScript Object Notation (JSON.) TerminusDB also generates JSON for models created visually using the dashboard.
JSON supports the definition of classes and subclasses. Classes define types of complex data structures. Sub-classes inherit all parent data type definitions. Examples below.
Class
Subclass
Properties for team
JSON for the organization model
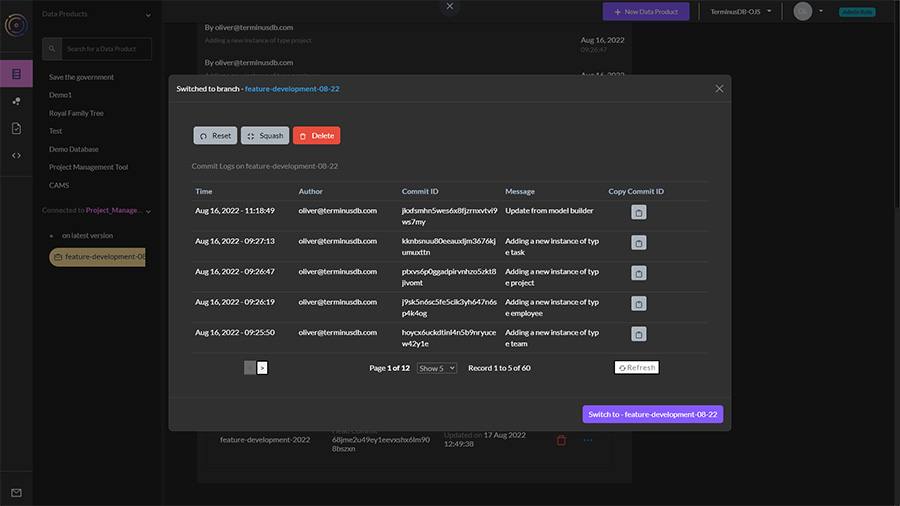
How-to branch a database using the TerminusDB local dashboard
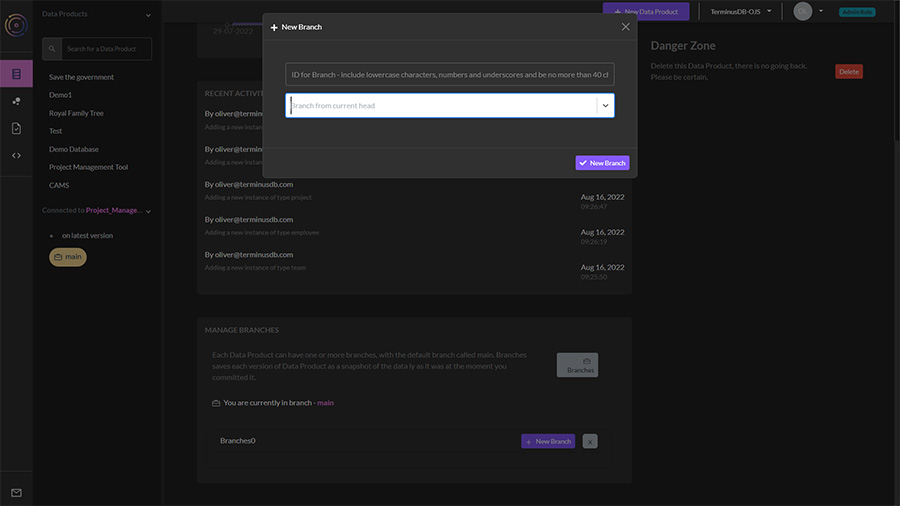
You can create branches of your data product within the local dashboard, to do this follow these instructions:
Choose Data Products from the lefthand menu - the first icon.
Click on branches and select new branch.
Name your branch and choose whether you want an empty branch, or to create it from the current head.
You can now switch between main and your branches by selecting the ellipsis menu where you can also reset to a specific commit, or squash the branch.
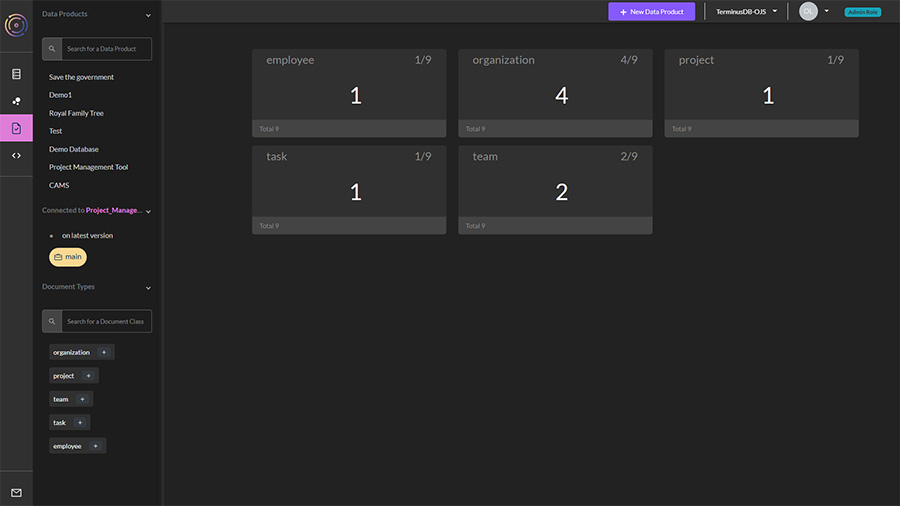
How-to explore, add, edit, and delete documents within your TerminusDB databases using the local Dashboard
Once you have created your schema you can explore the documents you created. TerminusDB creates document frames based on your schema and you can see what data is in the database, add data, and check out the document structure visually.
From the lefthand menu, select document explorer - third icon.
The initial window shows you how many documents you have by type. You can select a type to see the individual documents, and drill down further by clicking on the resulting list, here you can:
Edit the document
Delete it
View the JSON.
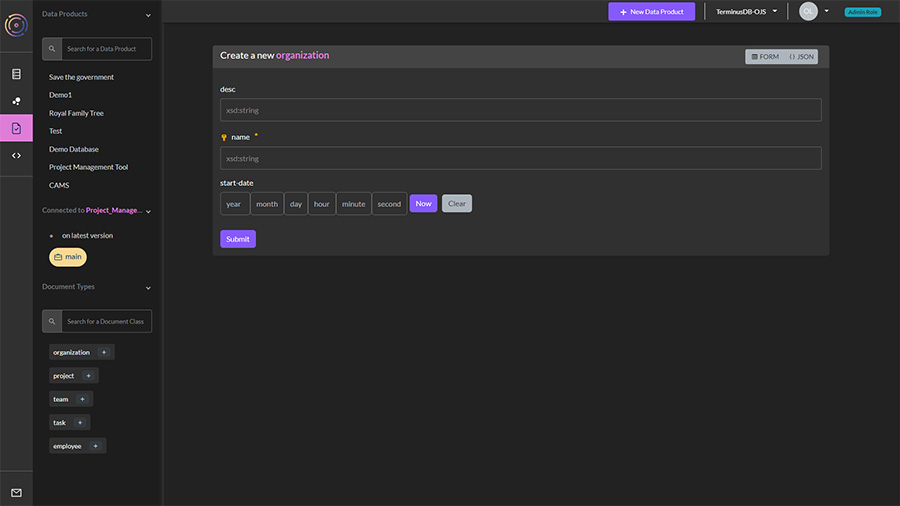
To add a document, select the + symbol in the type (from the lefthand column) you want to add.
The document frame will appear. This is defined by your schema.
Managing access control with the TerminusDB local dashboard
This article is a beginner's guide to managing organizations/teams and users with the TerminusDB dashboard.
In this article, we’ll do the following:
Install the local TerminusDB dashboard
Provide an overview of the default admin login and screens
Go through the administration and access control mechanisms to create new roles, users, and teams and connect them to data products.
Install and run TerminusDB as a Docker container, also referred to as TerminusDB bootstrap.
When installed, TerminusDB creates by default, an admin user and admin team. The admin user has the privileges to manage data products, and create teams and users.
Go to http://localhost:6363/dashboard and start to build your teams, users, and data products.
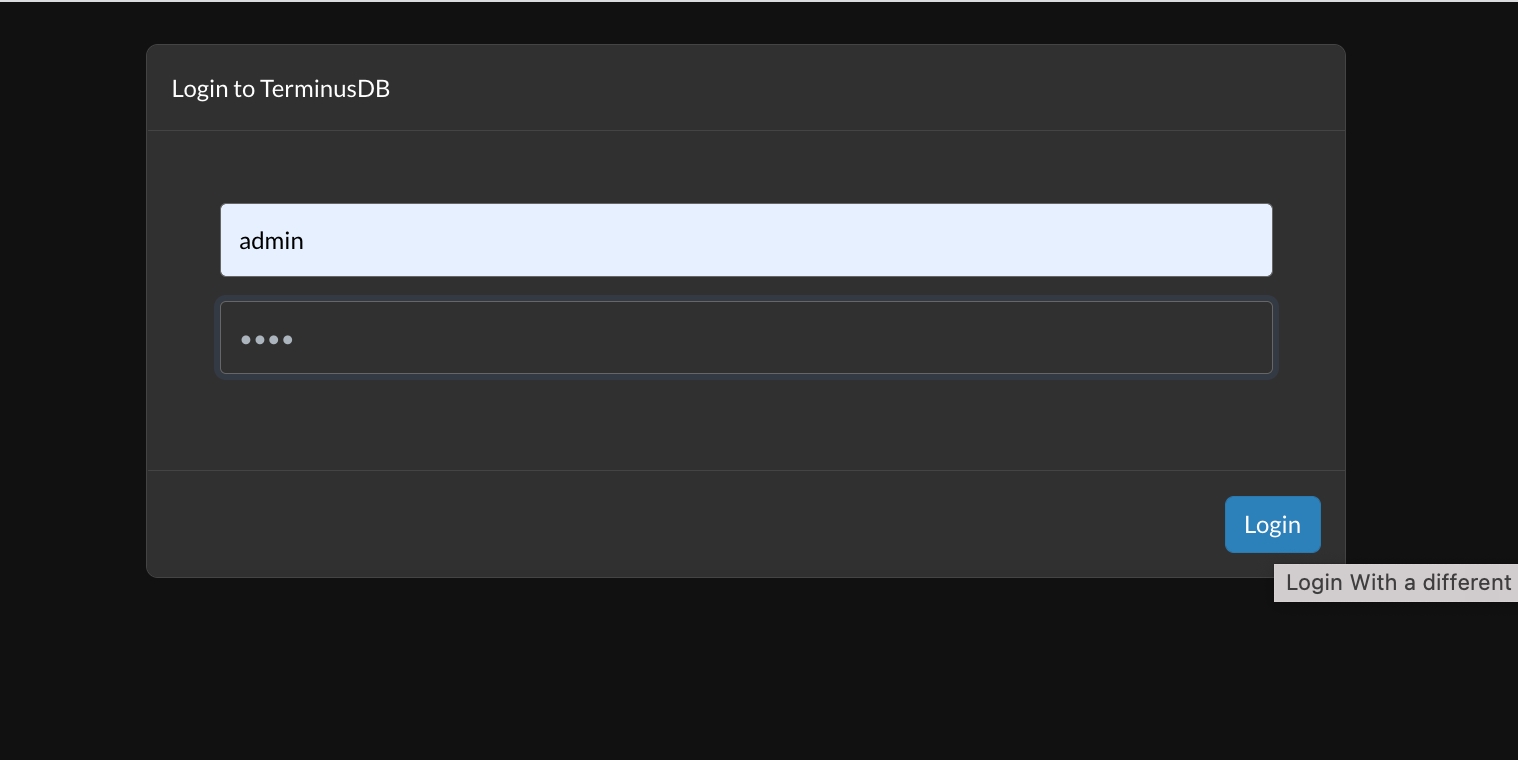
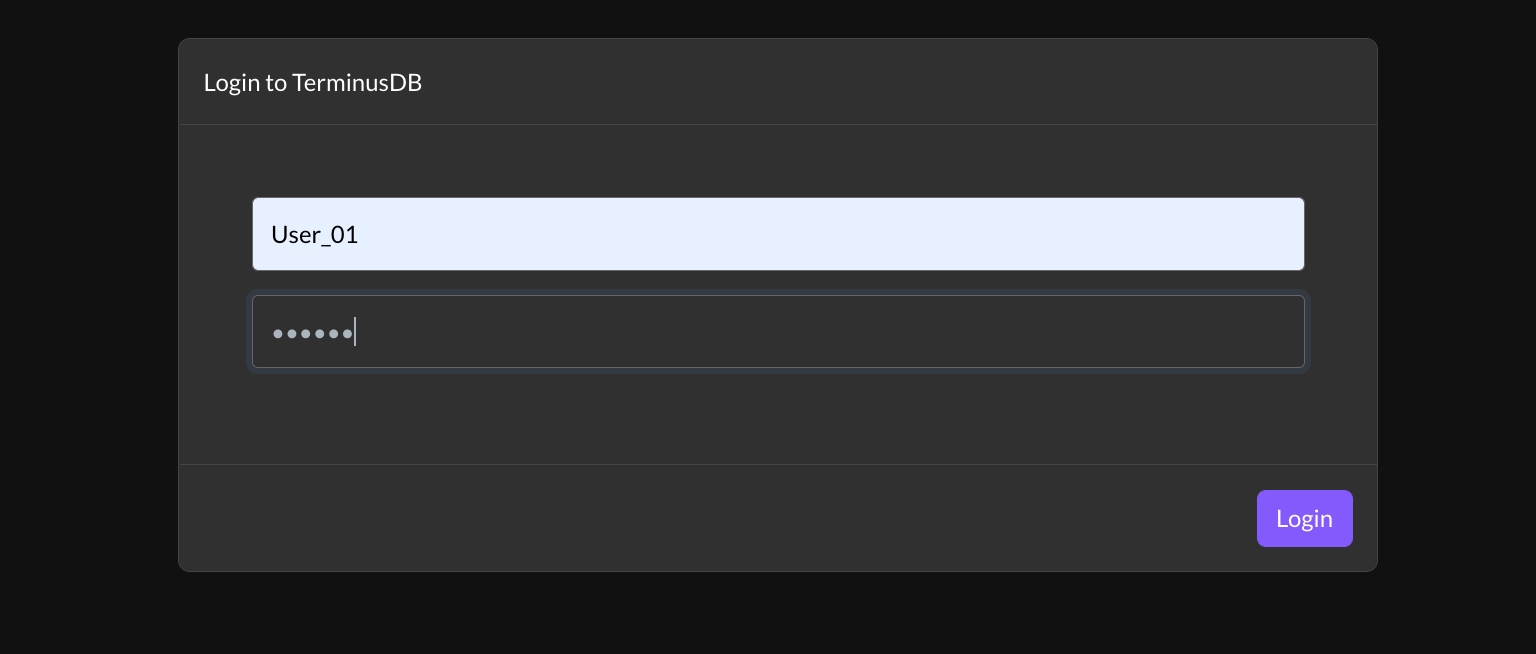
Login to the TerminusDB Dashboard using your admin credentials. if you did not change it, the default admin password is root.
Fill the form with the user (admin) and your admin password
Press "Login"
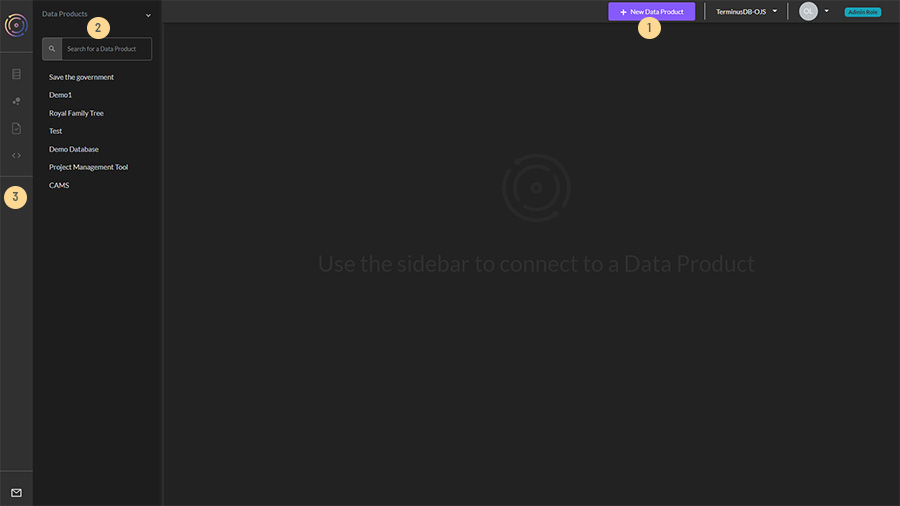
You'll be redirected to the dashboard home page
On the home page, you'll find a list of teams (referred to as Organizations in the TerminusDB System Database)
Select an existing team or create a new one. If no team is created or selected, some of the dashboard functionalities are disabled.
The Create a new Team button is enabled only for the admin user.
Admin can create a new personal team where they are the admin and can also create additional Teams and Users and configure user roles using the administrator interface.
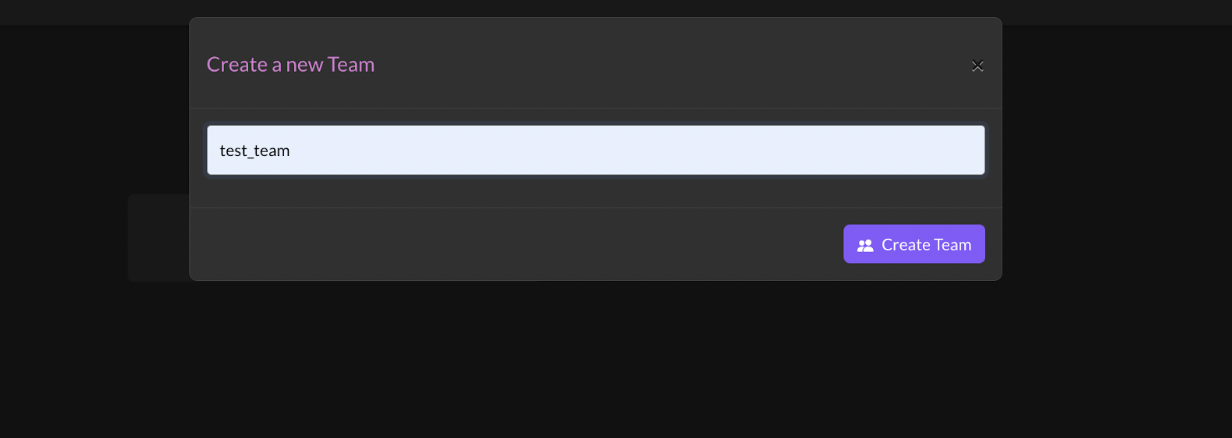
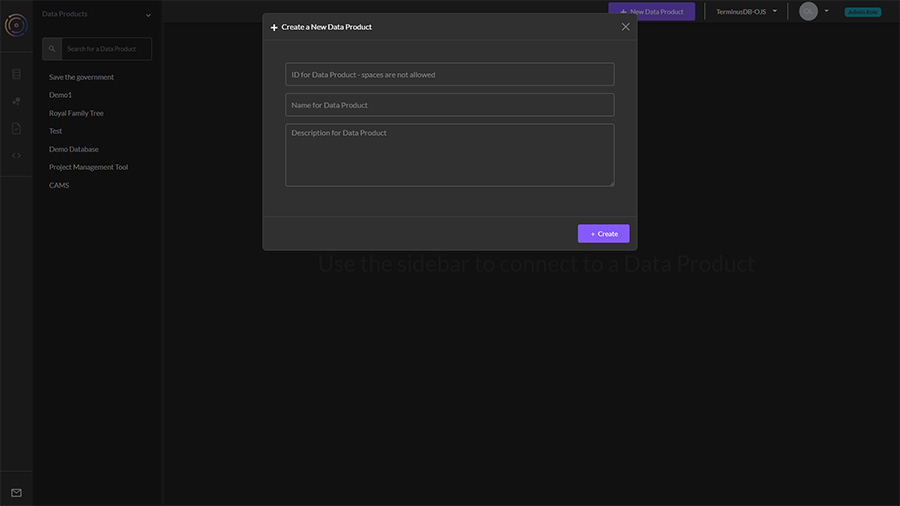
Click the button Create a new Team
The Create new team window will pop up
Insert the team name in the input field (the team name must be unique)
Click Create Team button
You will be redirected to the Team home page
The top bar from right to left displays:
The user role
The user name
The team name
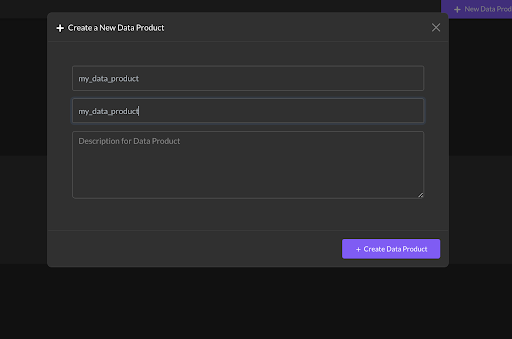
Select the New Data Product button
Enter the Data Product ID and name
Click Create Data Product button
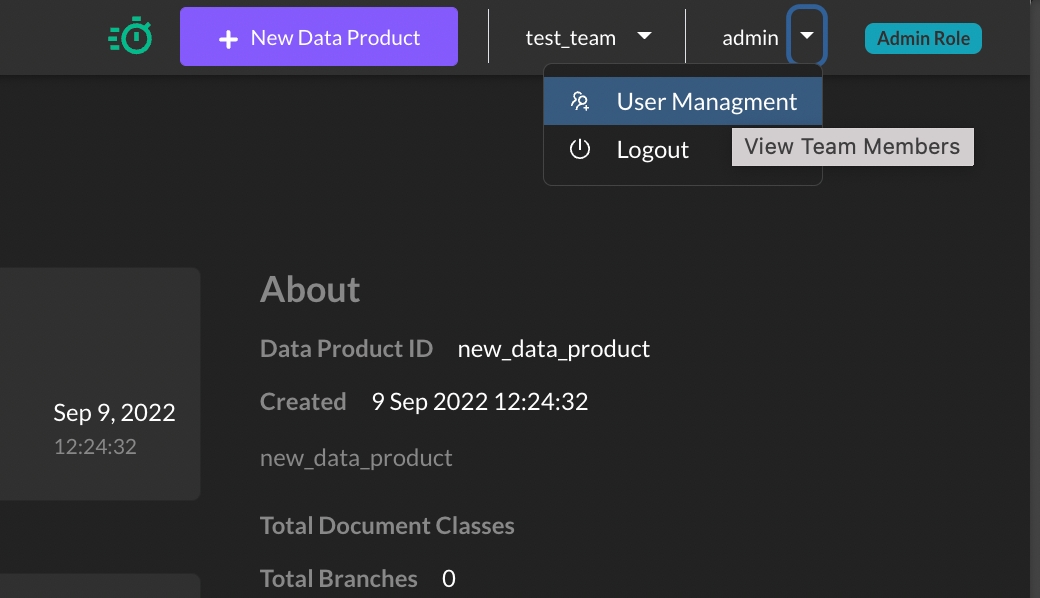
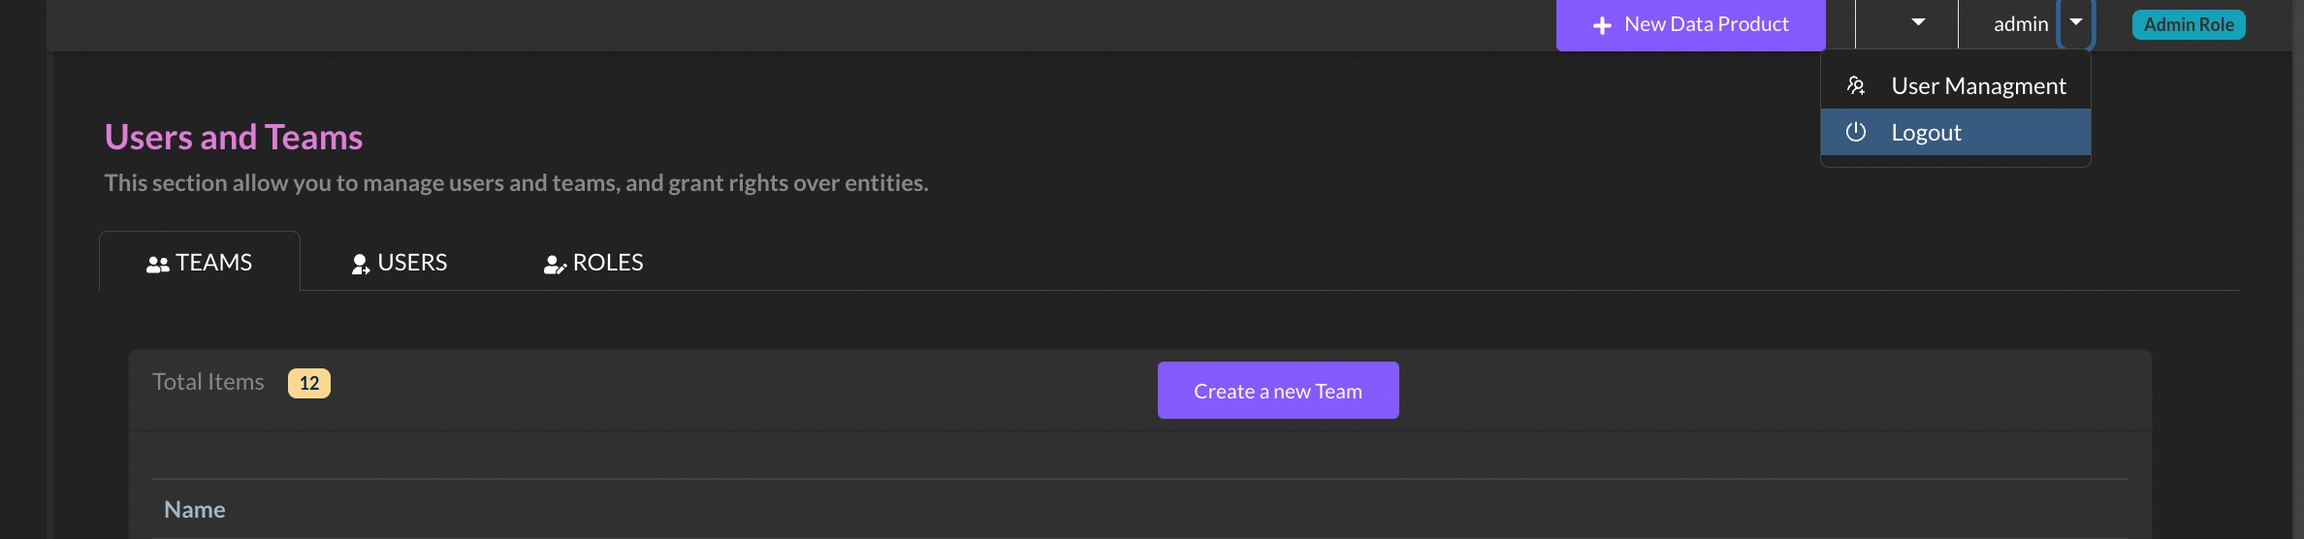
The administrator interface provides a visual console to easily administer TerminusDB teams and data products. In order to create roles, users, and teams, you need to be logged in as the admin.
Access the User Management section from the top bar.
Full documentation and all the definitions can be found here
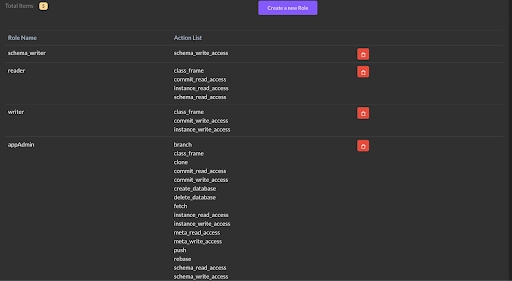
We are going to create four different roles: appAdmin, reader, writer, and schema_writer.
Navigate to the User Management section
Select the Roles tab
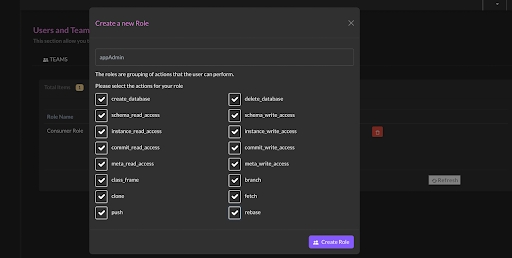
Select Create a new Role and a pop-up window will appear
Insert the role name and select the role permissions
Click Create Role button and a new role will be created
repeat all the steps for the others roles, you can see the actions for every roles in the image below
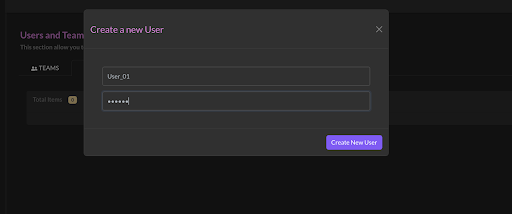
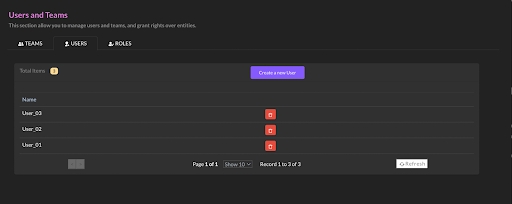
We are going to create three new Users:
User_01, User_02, and User_03 , all with the default password "NO_KEY"
Select the Users tab
Select Create a new User and a pop-up window will appear
Insert the user name and NO_KEY as the password
Click Create User Button and a new User will be created
Repeat these steps for the three users.
The new users are currently unrelated to any teams.
Next, we’ll get your teams up and running.
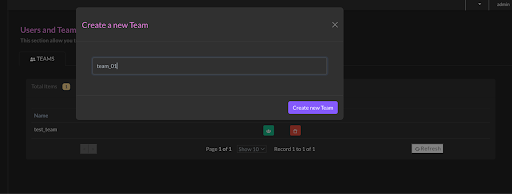
We are going to create three new teams: team_01, team_02, and team_03
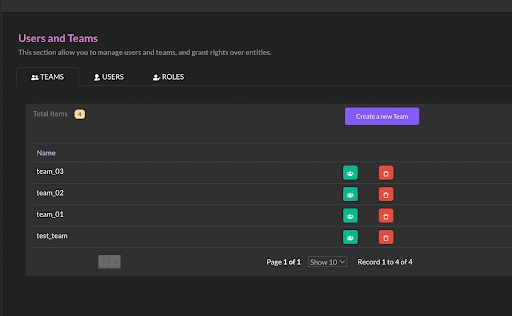
Select the Teams tab
Select Create New Team and a pop-up window will appear
Insert the team name
Click the Create Team button and a new Team will be created
Repeat these steps for the other two teams.
The new teams are not currently linked with any users.
We are going to add users to team_01, assigning them roles:
Choose the Teams tab
In the team_01 row, Select the Show Team Users icon
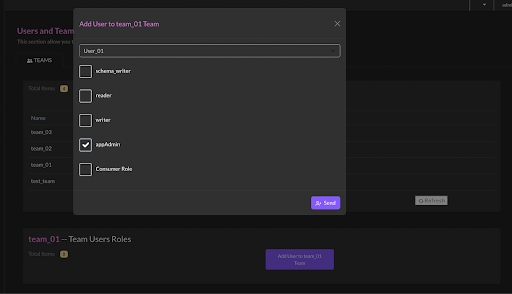
Select Add Users to team_01 Team
From the drop-down list, select User_01 and check the appAdmin role
Click Send, the User01 can now access the team team01 and all the data product under the team with role appAdmin
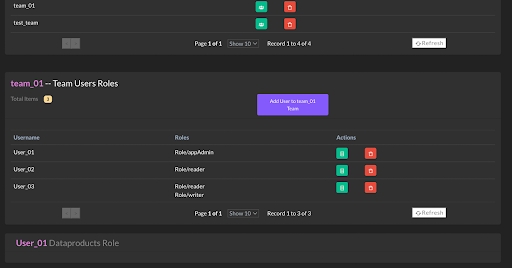
Repeat the same steps for the other users:
User_01 -> role -> reader
User_02 -> role -> reader /writer
Then do the following:
Connect team_03 with User_01 with a role appAdmin
Connect team_02 with User_02 with a role appAdmin
Now we are going to log in with User_01:
From the top bar, select Logout
You will redirect to the login page
Insert the user name and password - User_01 and NO_KEY
Press the Login button
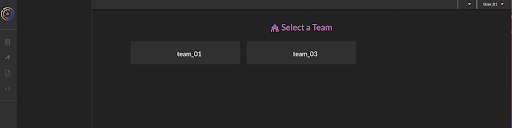
When you first sign in, you will see a list of the teams associated with this user, select team_01.
There are no data products associated with the team, so first we’ll create two new data products.
Press the New Data Product button and name it dataproduct_01
Repeat the process and name this one dataproduct_02
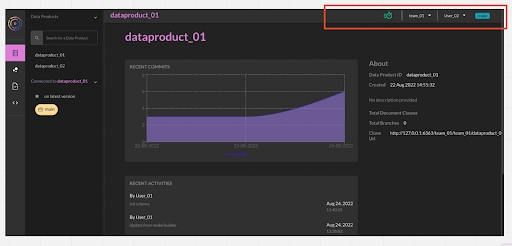
On the top bar, you will see from right to left:
the user team role/s "appAdmin",
the user name, User_01
the selected team name team_01
User_01 has the access privileges to create new data products and manage them.
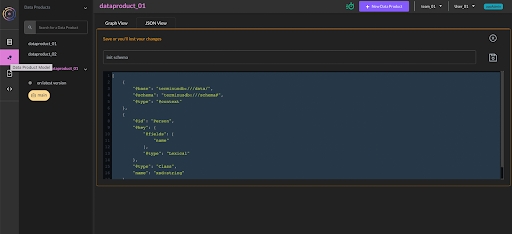
Select the Data Product Model icon from the icons menu on the left
Select JsonView on the Data Product Model page and copy the following schema
Select the save icon
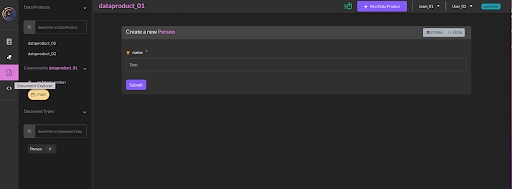
User_01 has ‘appAdmin’ privileges, so if navigating around the dashboard you can see that they can perform all the actions. For example, select the "document explorer" button on the left and insert a new Person Document.
Select Logout for the upper user menu
You'll redirect to the login page
Insert the credentials - User_02, password NO_KEY
Press Login button
For the teams home page select team_01
You'll arrive on the team_01 main page
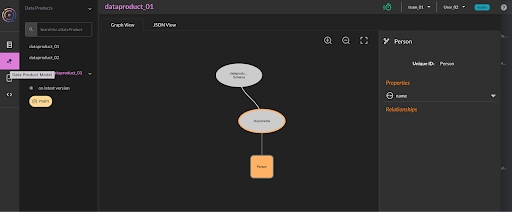
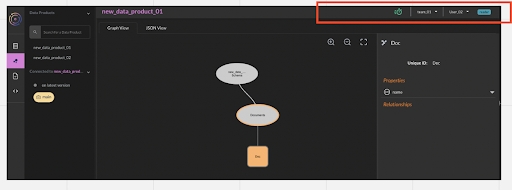
From the left menu, Select dataproduct_01
On the top bar from right to left you can see the user role "reader", the user name User_02, and the team name team_01
The user does not have permission to create databases within team_01 so the New Data Product button is hidden.
The user has schema_read permission level, and from the "Data Product Model" section, they can see the schema graph in view mode.
Login with the admin user again (the admin user is the only one that can manage teams, user roles, and capabilities)
Select Logout from the top menu bar,
You'll redirect to the login page
Insert admin and your admin password (default is root)
Select User Management from the top user menu to navigate to the access control management interface
From the team list table, select the green icon in the team_01 row
From the "team_01 -- Team Users Roles" table list, select the green icon in the User_02 row
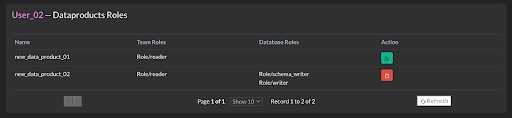
The user has no specific permissions at the data product level, but each data product inherits the team access level, in this instance a reader role.
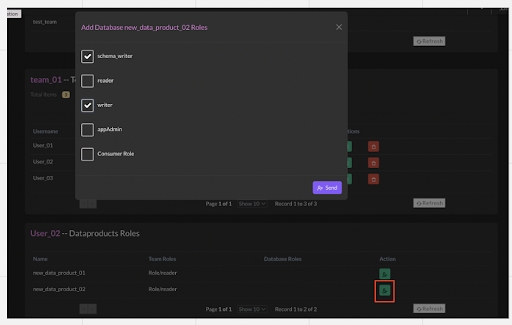
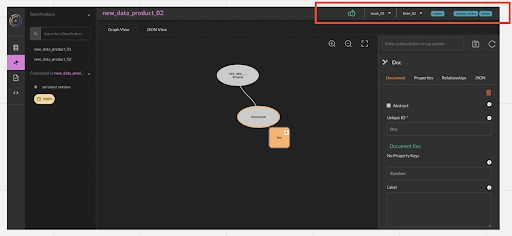
In the User_02 Dataproducts Roles table list, in the dataproduct_02 row:
Select the green Add database user roles icon
The Add Database new_data_product_02 roles window displays
Select schema_writer and writer roles for the list
Click Send
Login with User_02, NO_KEY, team_01
On the team_01 home page, select the dataproduct_02 from the data products pane
On the top bar, from right to left you will see:
User roles - reader + schema_writer + writer
The user name User_02
The selected Team team_01
As you can see, User_02 can now edit the schema in dataproduct_02.
Now select dataproduct_01, you will see that the user’s role is reader, so User_02 can only view the schema for this data product.