Manage Access Control with Dashboard
Managing access control with the TerminusDB local dashboard
This article is a beginner's guide to managing organizations/teams and users with the TerminusDB dashboard.
In this article, we’ll do the following:
Install the local TerminusDB dashboard
Provide an overview of the default admin login and screens
Go through the administration and access control mechanisms to create new roles, users, and teams and connect them to data products.
Install the Dashboard
Install and run TerminusDB as a Docker container, also referred to as TerminusDB bootstrap.
When installed, TerminusDB creates by default, an admin user and admin team. The admin user has the privileges to manage data products, and create teams and users.
Go to http://localhost:6363/dashboard and start to build your teams, users, and data products.
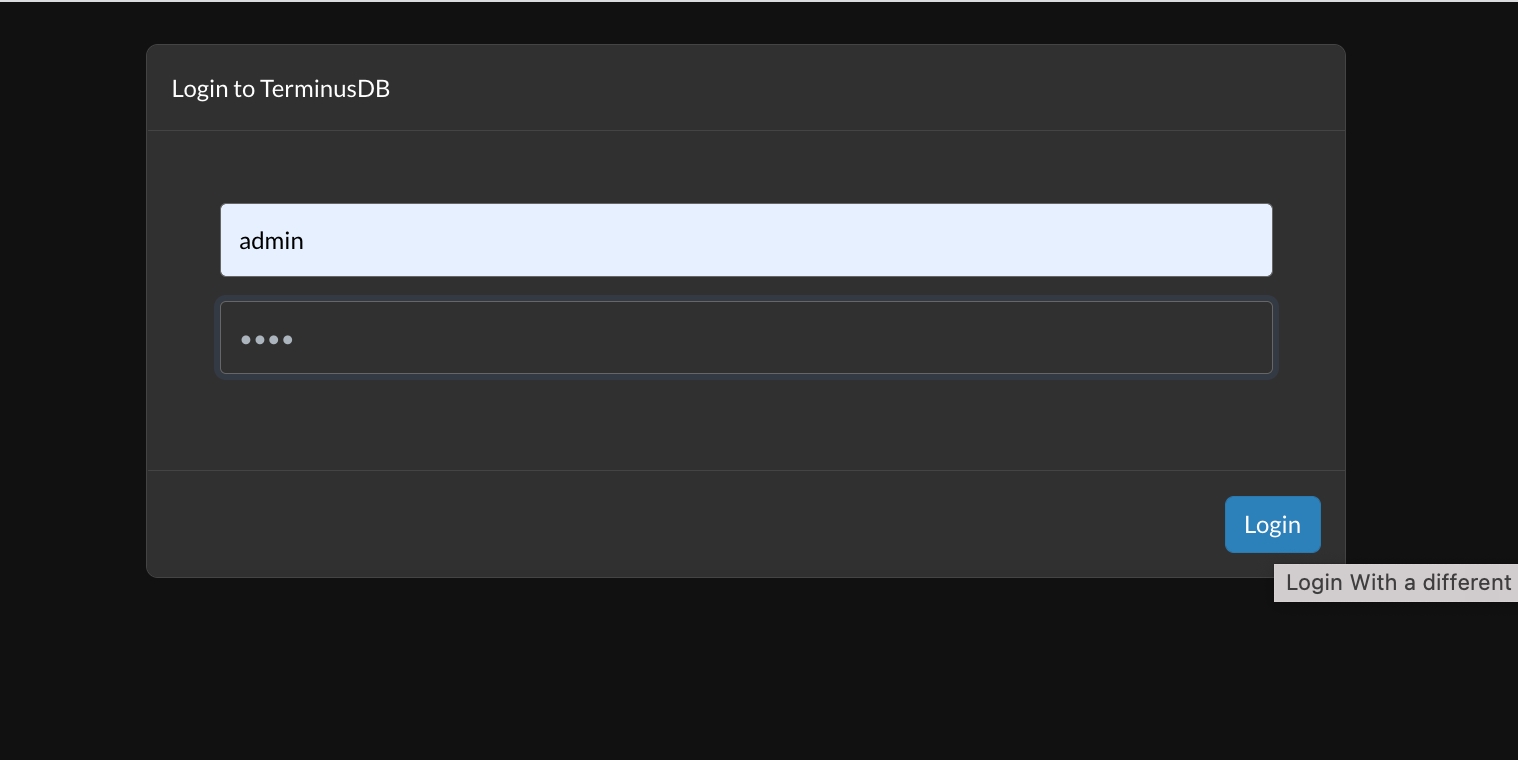
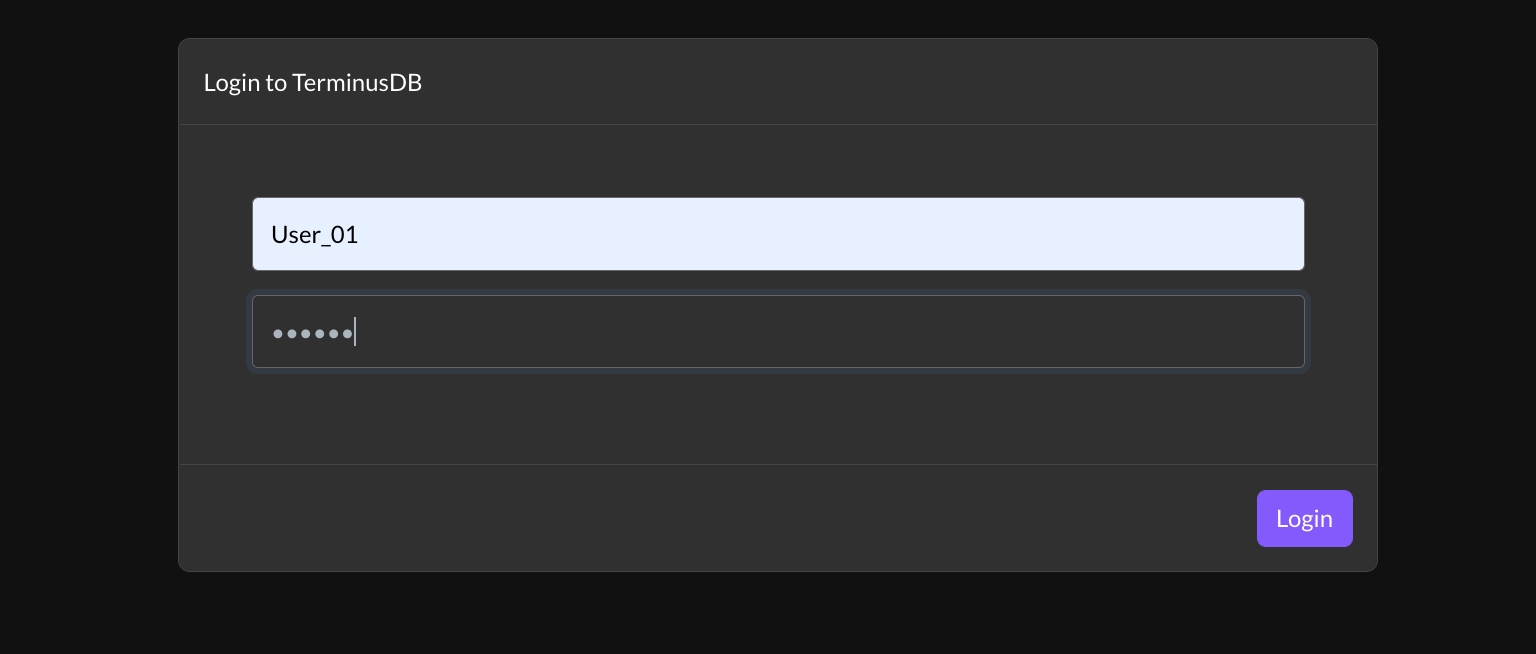
Login to TerminusDB
Login to the TerminusDB Dashboard using your admin credentials. if you did not change it, the default admin password is root.
Fill the form with the user (admin) and your admin password
Press "Login"
You'll be redirected to the dashboard home page
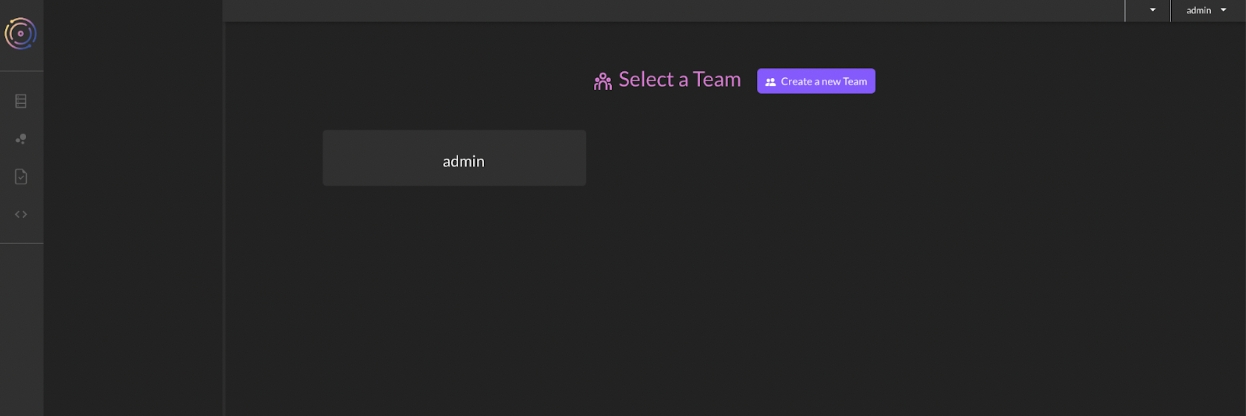
Dashboard Home Page
On the home page, you'll find a list of teams (referred to as Organizations in the TerminusDB System Database)
Select an existing team or create a new one. If no team is created or selected, some of the dashboard functionalities are disabled.
The Create a new Team button is enabled only for the admin user.
Admin can create a new personal team where they are the admin and can also create additional Teams and Users and configure user roles using the administrator interface.
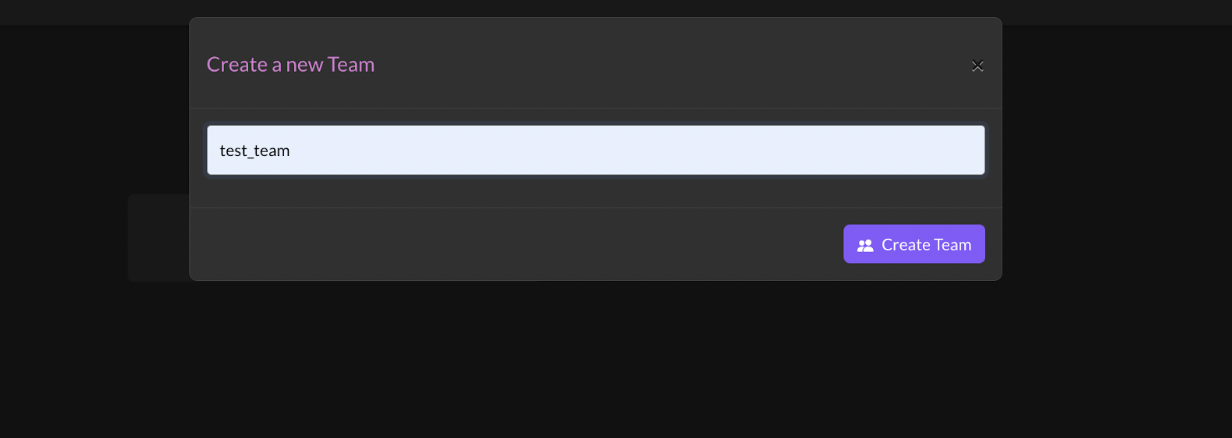
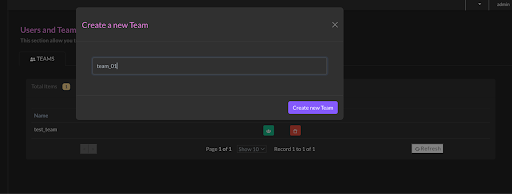
Creating a new team for the admin user
Click the button Create a new Team
The Create new team window will pop up
Insert the team name in the input field (the team name must be unique)
Click Create Team button
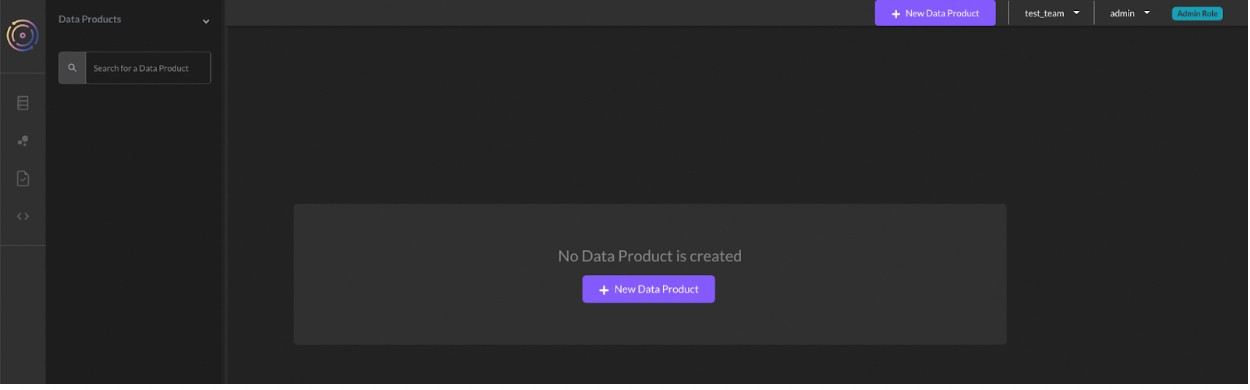
You will be redirected to the Team home page
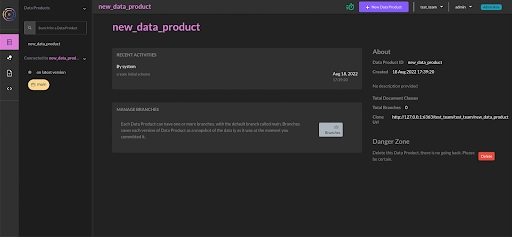
Team Home Page
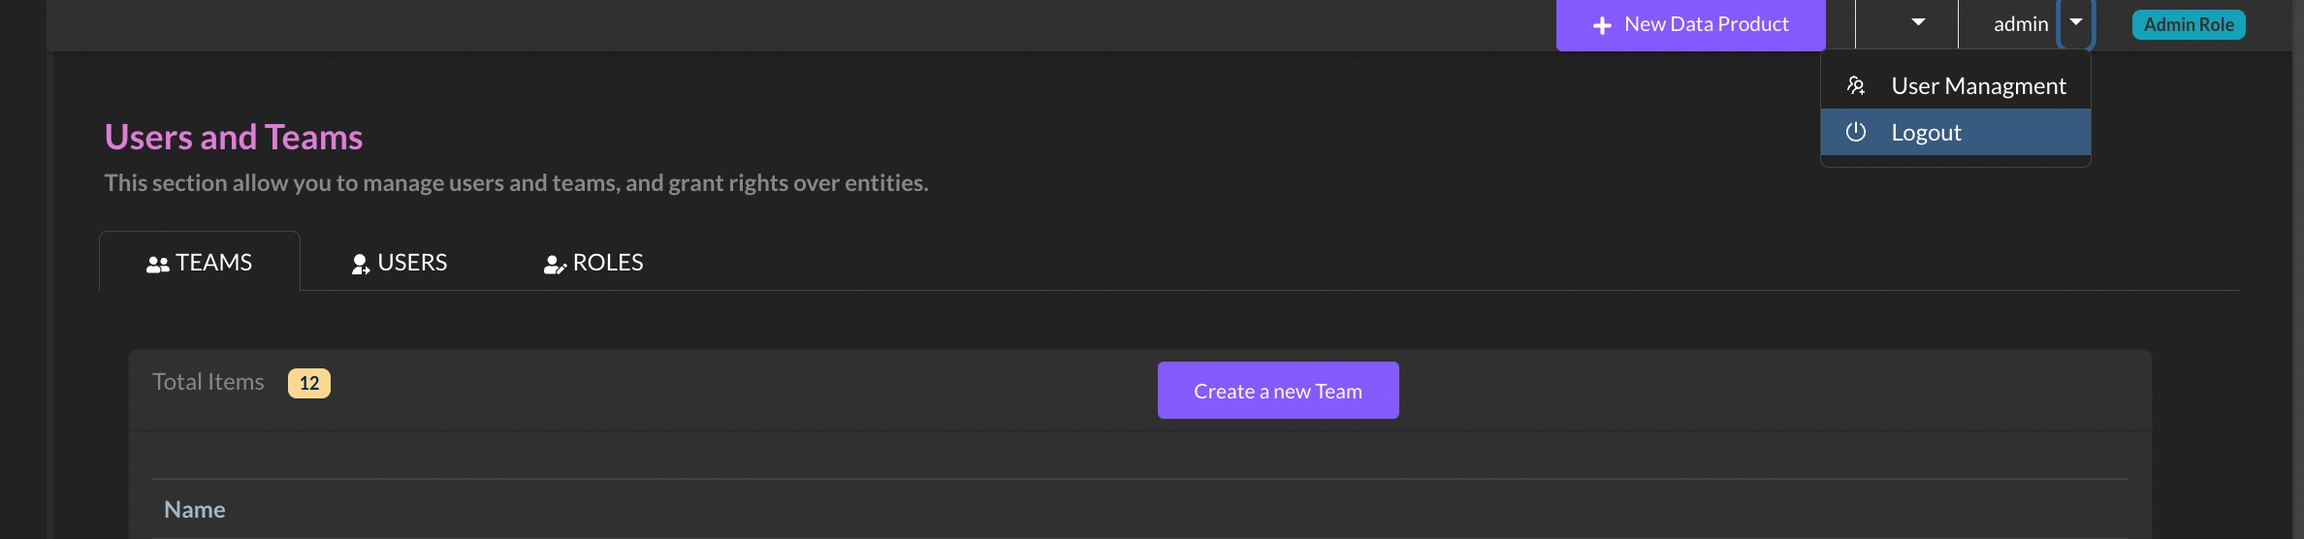
The top bar from right to left displays:
The user role
The user name
The team name
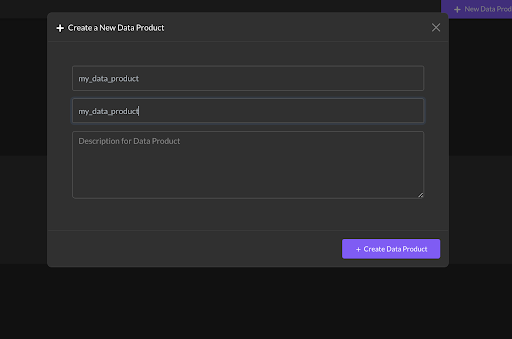
Create a New Data Product
Select the New Data Product button
Enter the Data Product ID and name
Click Create Data Product button
Administration and Access Control
The administrator interface provides a visual console to easily administer TerminusDB teams and data products. In order to create roles, users, and teams, you need to be logged in as the admin.
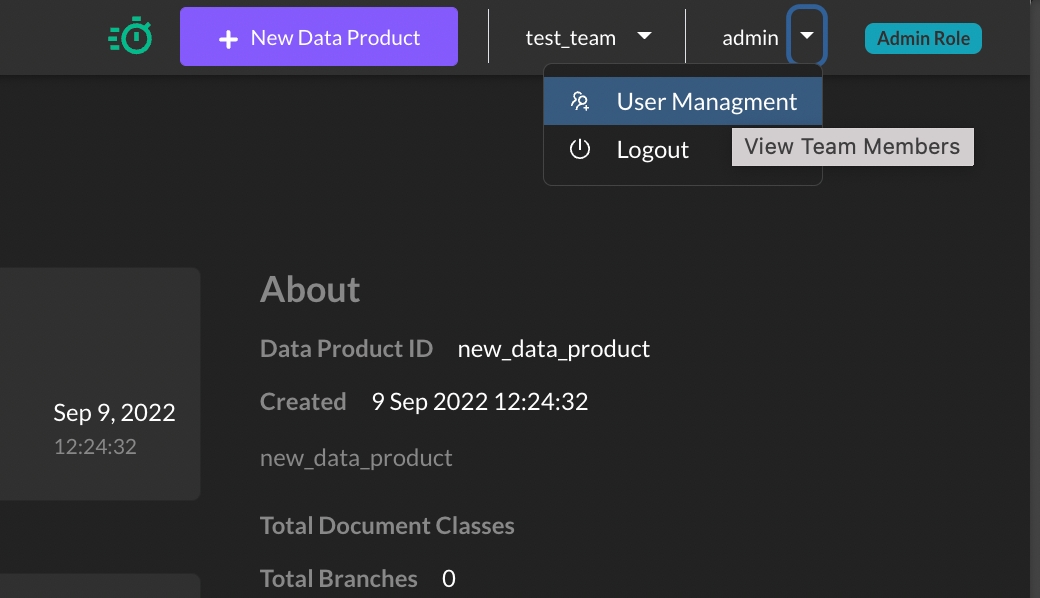
Access the User Management section from the top bar.
Full documentation and all the definitions can be found here
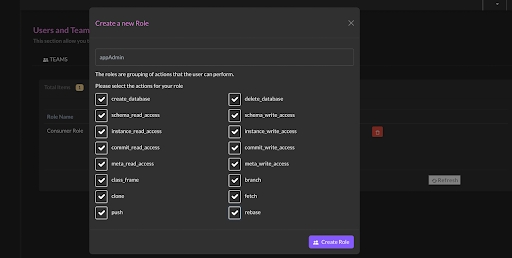
Create a new Role
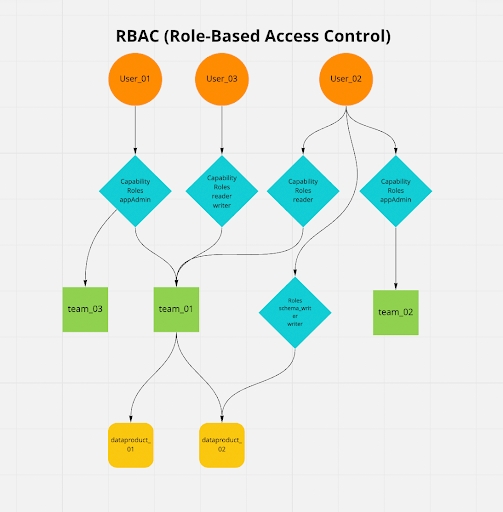
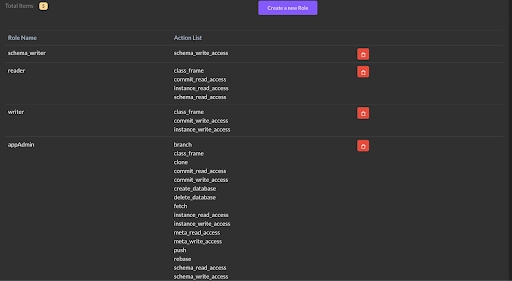
We are going to create four different roles: appAdmin, reader, writer, and schema_writer.
Navigate to the User Management section
Select the Roles tab
Select Create a new Role and a pop-up window will appear
Insert the role name and select the role permissions
Click Create Role button and a new role will be created
repeat all the steps for the others roles, you can see the actions for every roles in the image below
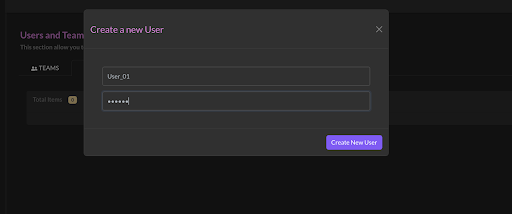
Create New Users
We are going to create three new Users:
User_01, User_02, and User_03 , all with the default password "NO_KEY"
Select the Users tab
Select Create a new User and a pop-up window will appear
Insert the user name and NO_KEY as the password
Click Create User Button and a new User will be created
Repeat these steps for the three users.
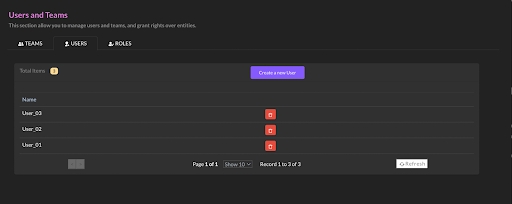
The new users are currently unrelated to any teams.
Next, we’ll get your teams up and running.
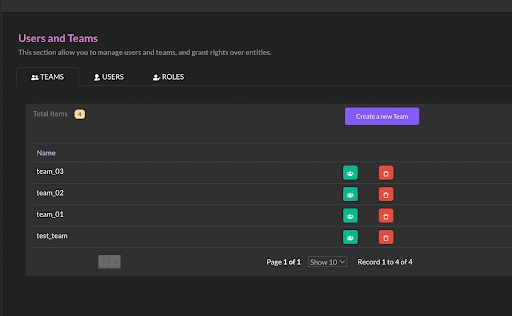
Create a New Team
We are going to create three new teams: team_01, team_02, and team_03
Select the Teams tab
Select Create New Team and a pop-up window will appear
Insert the team name
Click the Create Team button and a new Team will be created
Repeat these steps for the other two teams.
The new teams are not currently linked with any users.
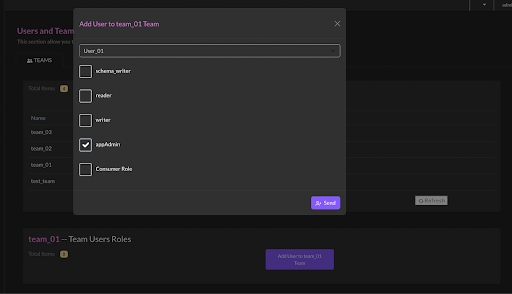
Add Users to Team_01
We are going to add users to team_01, assigning them roles:
Choose the Teams tab
In the team_01 row, Select the Show Team Users icon
Select Add Users to team_01 Team
From the drop-down list, select User_01 and check the appAdmin role
Click Send, the User01 can now access the team team01 and all the data product under the team with role appAdmin
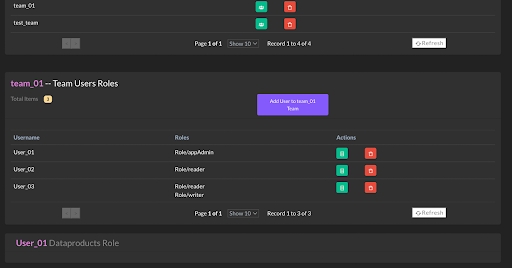
Repeat the same steps for the other users:
User_01 -> role -> reader
User_02 -> role -> reader /writer
Then do the following:
Connect team_03 with User_01 with a role appAdmin
Connect team_02 with User_02 with a role appAdmin
Log in with the User_01
Now we are going to log in with User_01:
From the top bar, select Logout
You will redirect to the login page
Insert the user name and password - User_01 and NO_KEY
Press the Login button
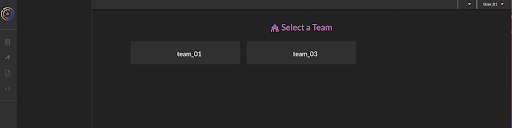
User_01 teams Homepage
When you first sign in, you will see a list of the teams associated with this user, select team_01.
There are no data products associated with the team, so first we’ll create two new data products.
Press the New Data Product button and name it dataproduct_01
Repeat the process and name this one dataproduct_02
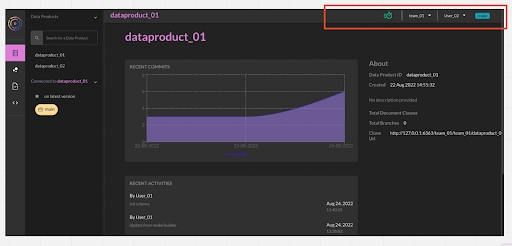
On the top bar, you will see from right to left:
the user team role/s "appAdmin",
the user name, User_01
the selected team name team_01
User_01 has the access privileges to create new data products and manage them.
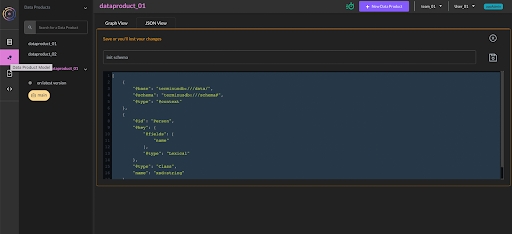
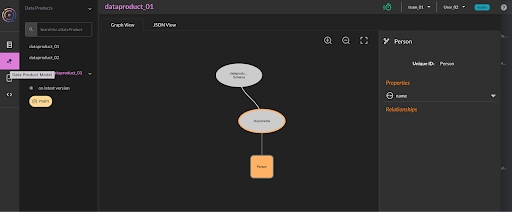
Create a Schema
Select the Data Product Model icon from the icons menu on the left
Select JsonView on the Data Product Model page and copy the following schema
Select the save icon
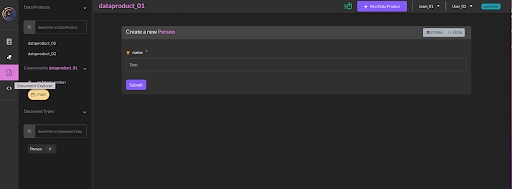
User_01 has ‘appAdmin’ privileges, so if navigating around the dashboard you can see that they can perform all the actions. For example, select the "document explorer" button on the left and insert a new Person Document.
Connect with User_02
Select Logout for the upper user menu
You'll redirect to the login page
Insert the credentials - User_02, password NO_KEY
Press Login button
For the teams home page select team_01
You'll arrive on the team_01 main page
From the left menu, Select dataproduct_01
On the top bar from right to left you can see the user role "reader", the user name User_02, and the team name team_01
The user does not have permission to create databases within team_01 so the New Data Product button is hidden.
The user has schema_read permission level, and from the "Data Product Model" section, they can see the schema graph in view mode.
Data product level permissions.
Login with the admin user again (the admin user is the only one that can manage teams, user roles, and capabilities)
Select Logout from the top menu bar,
You'll redirect to the login page
Insert admin and your admin password (default is root)
Select User Management from the top user menu to navigate to the access control management interface
From the team list table, select the green icon in the team_01 row
From the "team_01 -- Team Users Roles" table list, select the green icon in the User_02 row
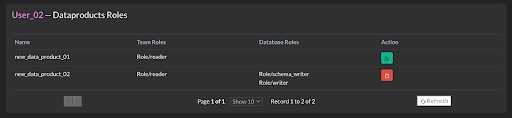
The user has no specific permissions at the data product level, but each data product inherits the team access level, in this instance a reader role.
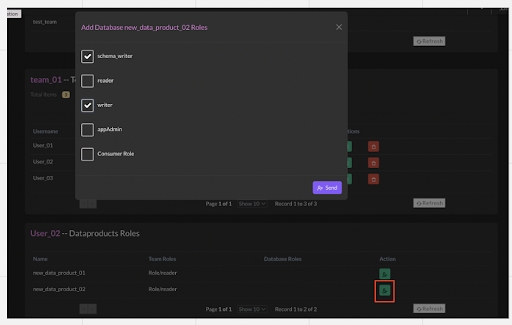
In the User_02 Dataproducts Roles table list, in the dataproduct_02 row:
Select the green Add database user roles icon
The Add Database new_data_product_02 roles window displays
Select schema_writer and writer roles for the list
Click Send
Check the new User_02 Permission
Login with User_02, NO_KEY, team_01
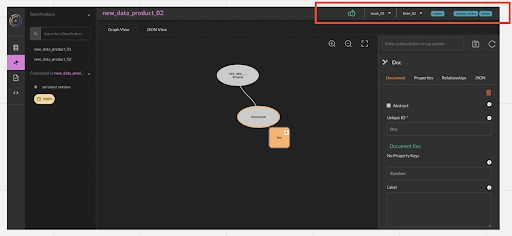
On the team_01 home page, select the dataproduct_02 from the data products pane
On the top bar, from right to left you will see:
User roles - reader + schema_writer + writer
The user name User_02
The selected Team team_01
As you can see, User_02 can now edit the schema in dataproduct_02.
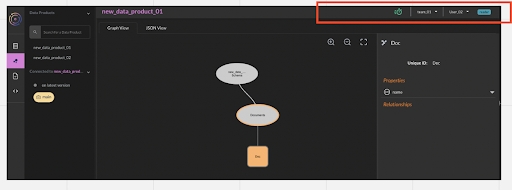
Now select dataproduct_01, you will see that the user’s role is reader, so User_02 can only view the schema for this data product.
Further Reading
Last updated